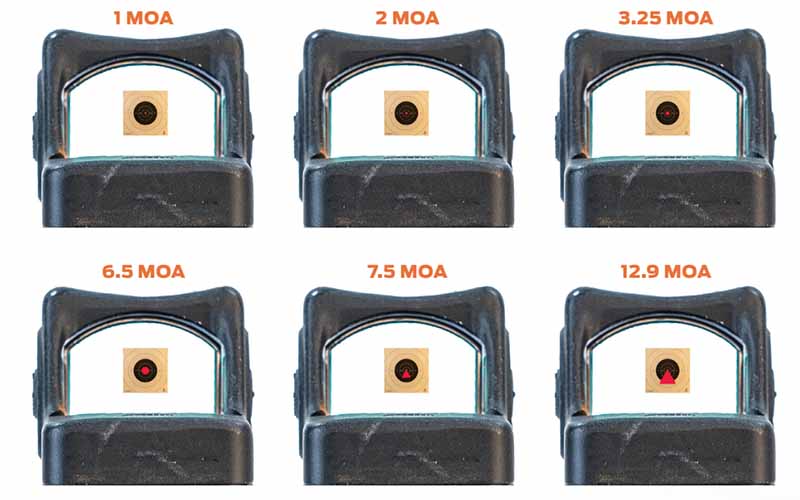
Want to delve deeper into How To Zero A Red Dot On A Pistol? Read this article to gain broader knowledge.

How to Zero a Red Dot on a Pistol: A Comprehensive Guide
Zeroing a red dot sight on a pistol is crucial for precise shooting. Whether you’re a seasoned shooter or a novice enthusiast, achieving an accurate zero is essential for consistent accuracy. In this comprehensive guide, we’ll delve into the basics and guide you through the step-by-step process of zeroing your red dot, ensuring you hit your targets with confidence.
While many modern red dot sights come pre-sighted, it’s still highly recommended to confirm and fine-tune the zero to match your specific firearm and shooting style. Even slight deviations can significantly impact your accuracy.
The Basics of Zeroing a Red Dot
Zeroing a red dot involves aligning the reticle (the illuminated dot) with the point of impact (POI) of the firearm. Essentially, you want the red dot to appear exactly where your bullet will strike at a given distance. The most common zeroing distance for pistols is 25 yards, which offers a versatile balance of accuracy and speed for most practical shooting applications.
Red dot sights feature adjustable turrets, which allow you to make precise adjustments to the reticle position. These turrets typically have clicks, enabling you to make minute adjustments with each click. The value of each click (usually measured in inches or minutes of angle) is specific to the particular sight model and should be clearly indicated in the manufacturer’s literature.
Step-by-Step Zeroing Procedure
To zero your red dot sight effectively, follow these steps diligently:
- Prepare Your Range: Choose a safe and suitable shooting range with adequate distance for zeroing (typically 25 yards). Ensure proper safety protocols are in place.
- Mount the Red Dot Securely: Mount the red dot sight on your pistol according to the manufacturer’s instructions. Ensure it is securely attached and properly aligned with the bore axis of your firearm.
- Set the Red Dot Brightness: Adjust the brightness level of the red dot to suit the ambient lighting conditions. Avoid excessively bright or dim settings.
- Fire the First Shot: Aim at the center of a target at the designated zeroing distance (25 yards). Fire a single shot, maintaining a stable and consistent shooting stance.
- Evaluate the Point of Impact: Observe the point where the bullet strikes the target. This is your initial point of impact (POI). If the POI is significantly off the center, make necessary adjustments to your red dot sight using the adjustment turrets.
- Make Adjustments: Determine the direction and magnitude of adjustment required. If the POI is high, adjust the turret downward; if it’s low, adjust upward. If the POI is to the left, adjust the turret to the right; if it’s to the right, adjust to the left.
- Repeat Steps 4-6: Fire a second shot and repeat the process of evaluating the POI and making adjustments. Continue this iterative process until the POI matches the center of the target.
Tips and Expert Advice
Here are some additional tips and expert advice to enhance your zeroing experience:
- Use a Rest or Support: A stable shooting rest or sandbags can minimize the effects of human error and help maintain consistent accuracy.
- Shoot Multiple Rounds: Firing multiple shots at each distance and averaging the POI will provide more precise results.
- Confirm the Zero at Different Distances: Once you have zeroed your red dot at one distance (e.g., 25 yards), it’s recommended to confirm the zero at other distances to ensure optimal accuracy at various ranges.
- Consider Ammunition Choice: Different types of ammunition can have varying trajectories. If you plan to use specific ammunition for your firearm, it’s wise to zero your red dot with that particular ammunition.
Frequently Asked Questions (FAQs)
Here are some common questions and concise answers regarding red dot zeroing:
- Q: What if my red dot is still off after multiple adjustments?
A: If you encounter persistent misalignment after careful adjustments, it’s possible there may be issues with the red dot itself or other factors. Consider seeking assistance from a qualified gunsmith or firearm expert.
- Q: Can I zero a red dot without shooting live ammunition?
A: Yes, you can use laser bore sights or other alignment tools to zero a red dot without firing live rounds. However, it’s still recommended to confirm the zero with live ammunition to account for any discrepancies.
- Q: How often should I re-zero my red dot?
A: Re-zeroing is recommended after significant impacts, such as a hard fall or collision. It’s also a good practice to verify and adjust the zero periodically, especially if you experience changes in shooting conditions or use different ammunition.
Conclusion
Zeroing a red dot on a pistol is a crucial skill for accurate shooting. By following the comprehensive steps, tips, and advice outlined in this article, you can confidently achieve a precise zero and enhance your shooting accuracy. Remember to prioritize safety and consult with experts if needed.
Are you an avid shooter who wants to elevate your accuracy? Have you ever wondered how to zero a red dot on a pistol and unlock consistent precision? Dive into this comprehensive guide and master the art of red dot zeroing. Share your experiences and insights in the comments below, and let’s ignite a discussion on zeroing techniques and best practices.

Image: gunandsurvival.com
An article about How To Zero A Red Dot On A Pistol has been read by you. Thank you for visiting our website. We hope you benefit from How To Zero A Red Dot On A Pistol.